Scaniverse Scanning Guide: Techniques, Patterns, and Best Practices
This guide explains how to plan and execute high-quality scans in Scaniverse using your phone. Following these techniques will help you capture reliable data that can be turned into meshes and splats, and reused across playback sessions, asset inspection, and future activations.
Whether you’re scanning a single room or a large outdoor area, the goal is the same: capture enough overlapping visual information for Portal to understand the space consistently.
1. What This Guide Covers (and What It Doesn’t)
This guide covers:
- How to plan for a successful scan
- Recommended scanning planning, techniques, patterns and when to use them
- Indoor, outdoor, and mixed-environment use cases
- How to review coverage and decide when additional scans are needed
This guide does not cover:
- Asset processing internals
- Debugging failed uploads
- VPS deployment or configuration
- Advanced asset tuning
Note: While this guide focuses on scanning, inspecting assets and reviewing playback sessions in the Web Portal can help you identify gaps and decide where to add more scans.
2. How Scanning Works (Conceptual Overview)
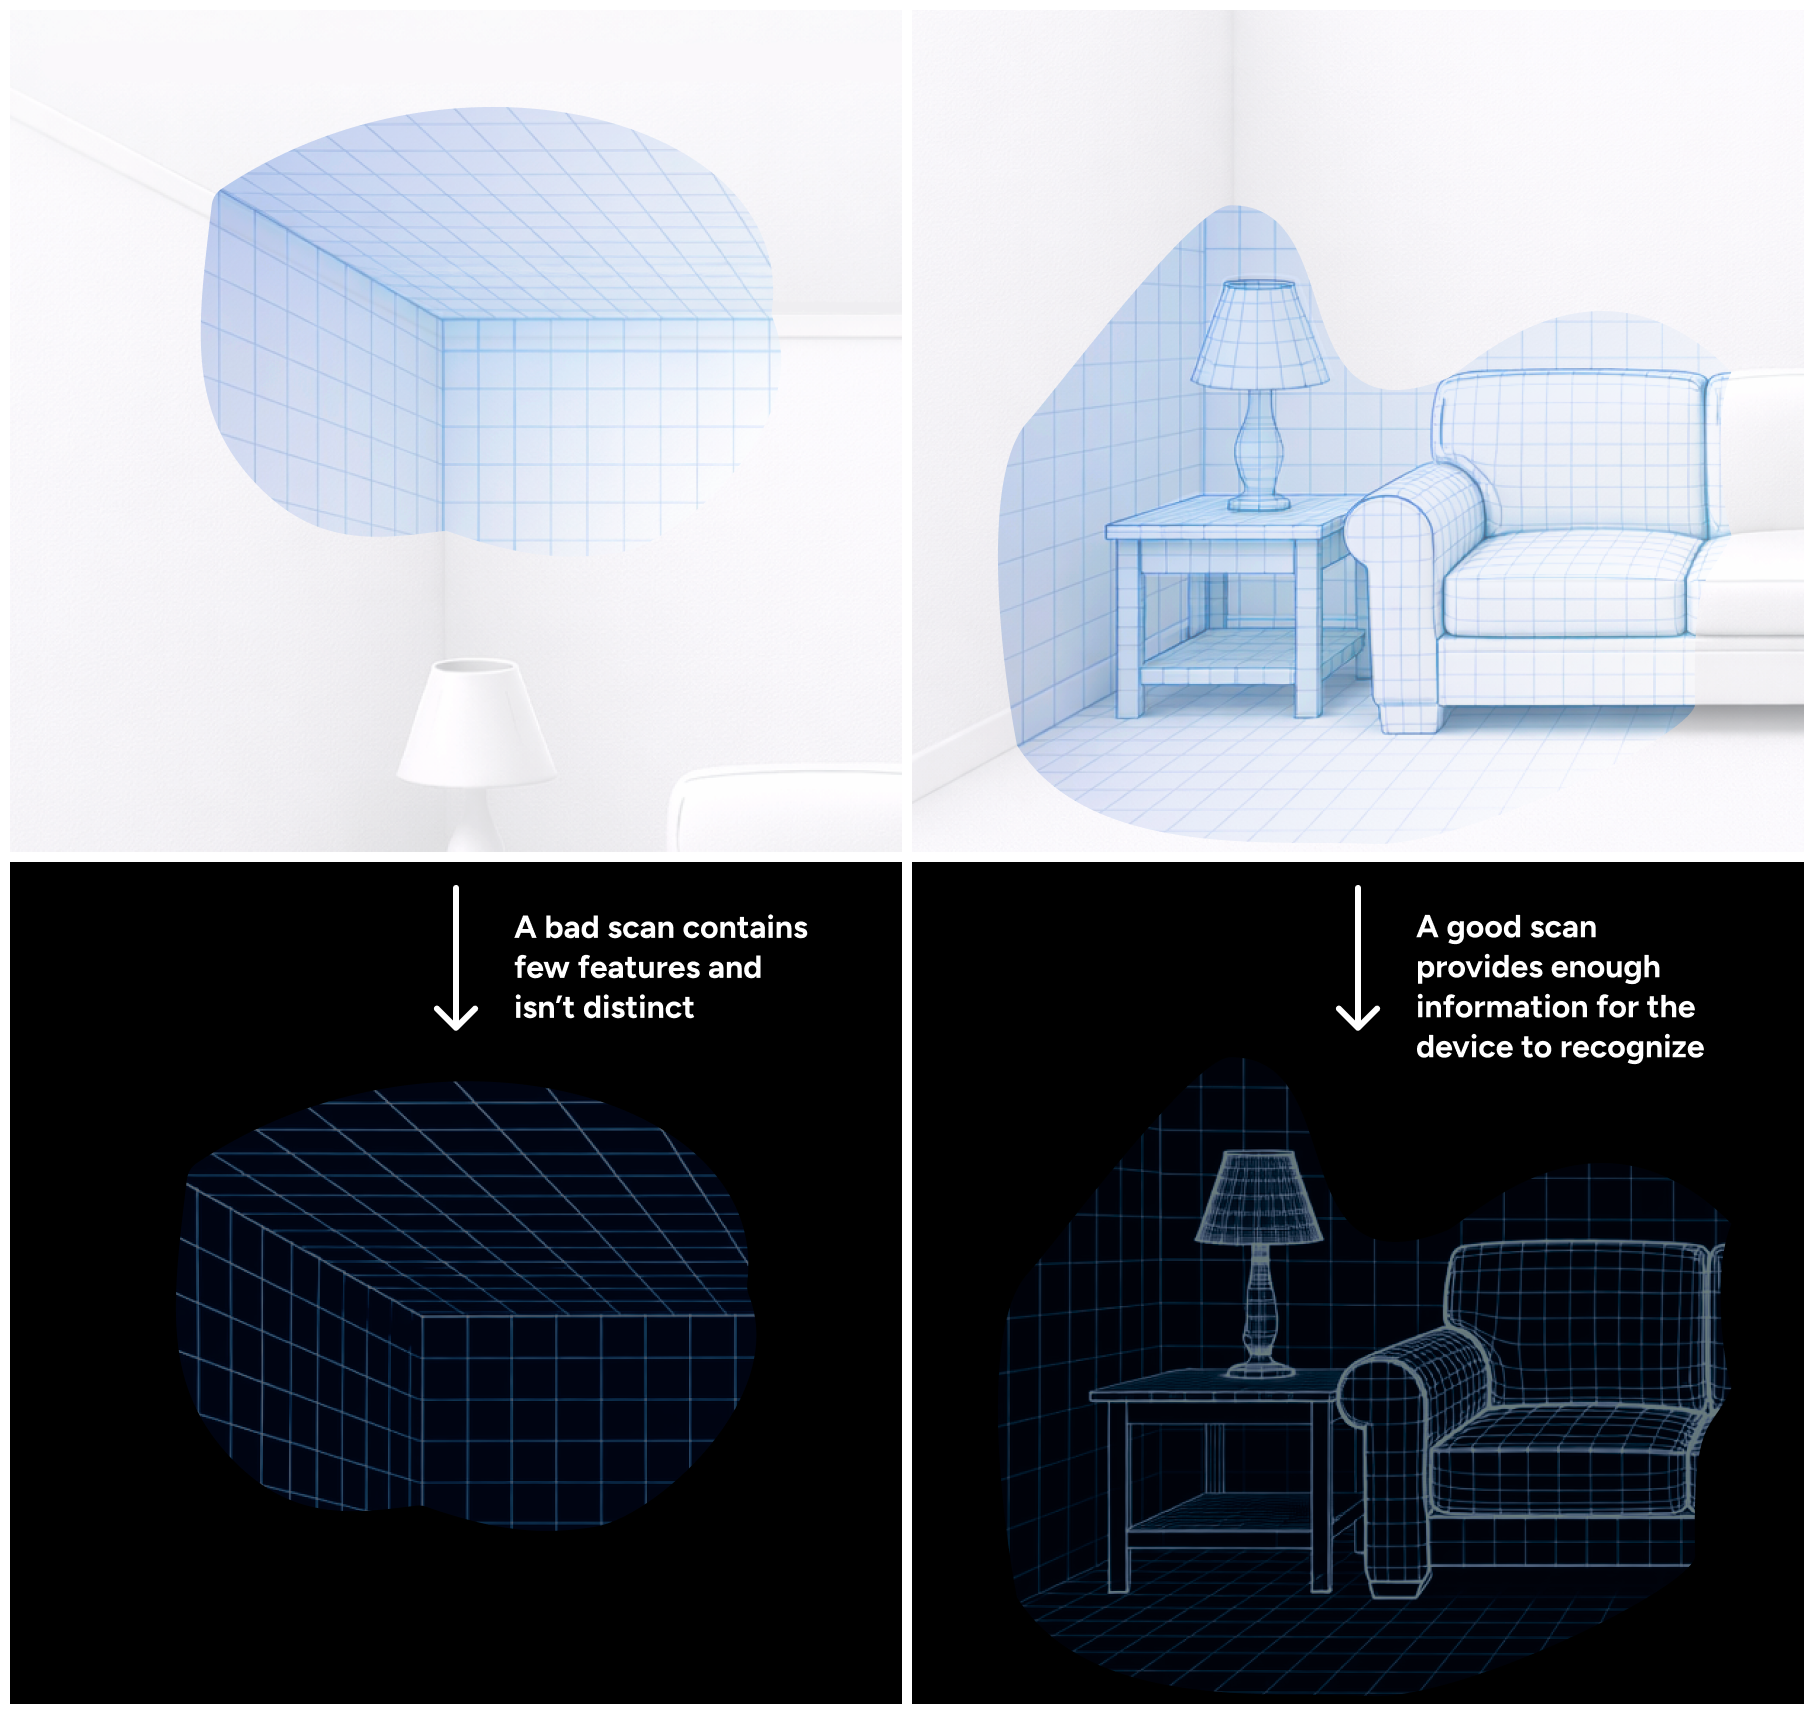
Scans are the foundation for all the assets and features delivered by Scaniverse for enterprise. Great scans will create great assets, poor scans can degrade the performance of a Site.
When you scan with the Scaniverse, you are capturing a combination of:
- Images (in high and low resolution)
- Accurate 3D positioning of the device
- Depth information (if your device is equipped with LiDAR)
This data is later used to generate assets such as:
- Meshes (geometry suitable for spatial alignment and VPS-related use cases)
- Splats (dense visual representations of a space)
General principles for good scans
Good scans are:
- Stable and avoid fast movements (to prevent blur or position tracking loss)
- In constant movement, even if very slow
- Include overlapping views of the same features
- Capture multiple angles and distances
- Avoid large featureless or repetitive areas without distinct features (to prevent tracking loss)
Poor scans often fail not because something was missing, but because the system couldn’t reliably connect what it saw from one moment to the next. Note that scans in Scaniverse have a 5 minute limit, but multiple can be taken for a site.
How Many Scans Do I Need?
The number of scans depends on the type and size of the site. Use this as a starting guideline:
| Site Type | Typical Size Range | Recommended scan amounts and patterns | Notes |
|---|---|---|---|
| Object-Centric Site | A few centimeters to several meters | 1 scan (orbit pattern) | Best for statues, furniture, signage, or single landmarks. Focus on orbiting and capturing from multiple angles. |
| Single Room | Several m² up to ~300–400 m² | 1 overview scan + optional detail scans | Start with a perimeter + triple-run overview scan. Add detail scans only where coverage is weak. |
| Multiple Rooms (Connected) | ~300–1,000+ m² | 1 overview scan per connected area + transition coverage | Ensure strong overlap through doors and hallways. Treat transitions as critical anchor points. |
| Single Outdoor Point of Interest | Several meters to ~20–30 meters across | 1–2 orbit scans at varying distances | Include surrounding context, not just the object itself. |
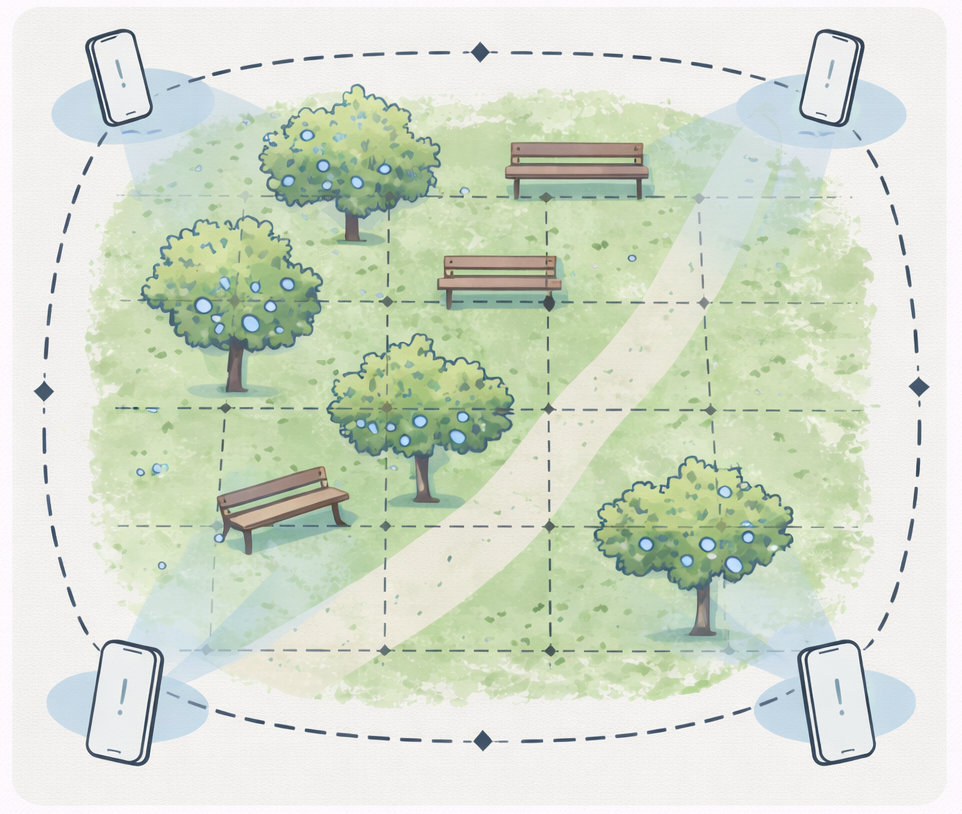
| Large Outdoor Area | Hundreds to thousands of m² | Perimeter scan(s) + interior lattice passes | Start with a perimeter loop, then add lattice/grid scans to reduce drift and increase robustness. If the area is too big, break down the site to smaller chunks and complete a scan of each section. |
| Indoor + Outdoor Combined Site | Varies | Separate scans per zone with strong overlap at thresholds | Pause and ensure visible shared features at doorways and transitions. |
3. Planning for a Successful Scan
3.1 Create Your Site
Before scanning, create your site in the Web Portal.
Why this matters:
- It helps organize scans from the start
- It makes it easier to activate and review assets later
- It reduces the chance of rescanning due to structural mistakes
Recommended: Use a desktop or laptop browser for faster setup and easier navigation.
3.2 Prepare Your Device
Before heading out:
- Fully charge your phone
- Bring one or more power banks for large areas or extended sessions
- Close unnecessary background apps
Scanning can be battery-intensive, especially when capturing larger or more detailed spaces. It is not recommended to scan with a low battery, or with power saving mode active. It is recommended to charge your device when it is below 50% while scanning.
3.3 Scope the Area Before You Scan
Spend a few minutes understanding the space:
- Use online maps, satellite imagery, or floor plans
- Identify boundaries, transitions, and points of interest
- Decide where scans should start and end
This upfront planning helps you:
- Choose the right scanning patterns
- Avoid missing key areas
- Reduce unnecessary rescans
- Decide if the site should be divided into multiple scans (due to size or complexity)
The good news is that this becomes second nature and over time, this step can be done onsite.
4. Core Scanning Principles (Applies Everywhere)
4.1 Follow On-Device Guidance
Scaniverse provides live meshing feedback while scanning. This is your primary signal that the system is understanding what it sees.
If meshing becomes sparse or unstable:
- Slow down
- Reorient toward previously scanned features
- Increase overlap with earlier views
4.2 Capture Multiple Viewpoints
Avoid capturing objects or areas from a single angle.
Instead:
- Move laterally (left/right)
- Change height and tilt
- Vary your distance from the object/area
- Don’t stop moving
This creates stereo pairs, which are essential for reliable reconstruction.


4.3 Ensure Sufficient Overlap
Every scan should share visible feature points with:
- Earlier moments in the same scan
- Other scans intended to connect to it
A good rule of thumb:
If you can still see part of what you scanned earlier, you’re probably maintaining enough overlap.
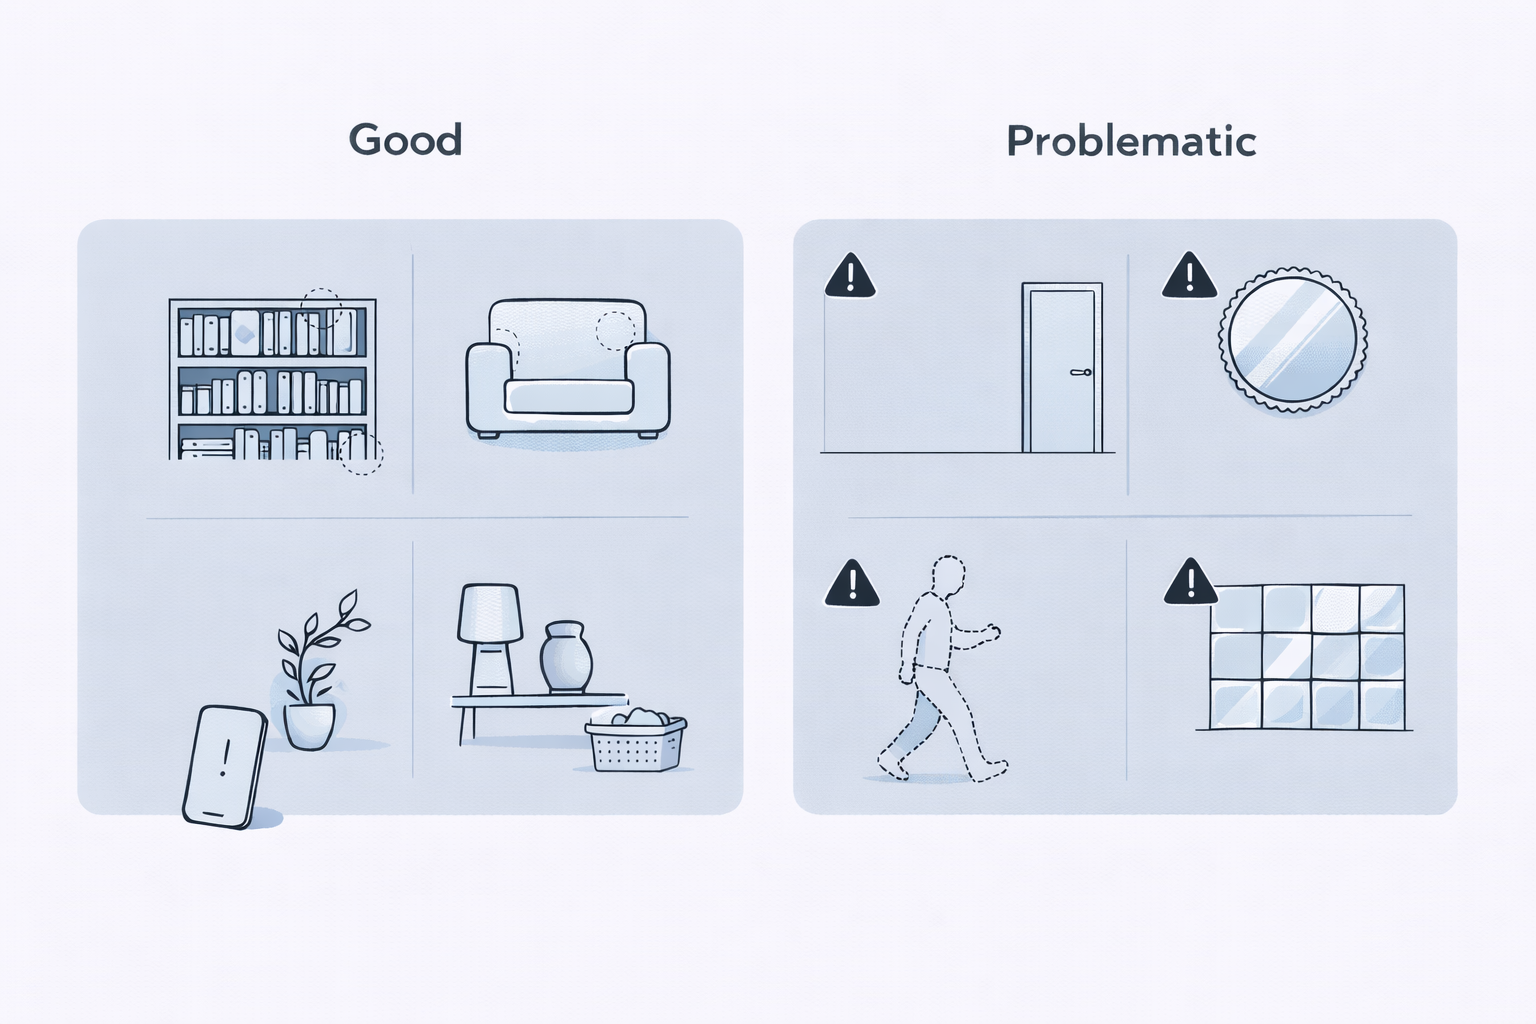
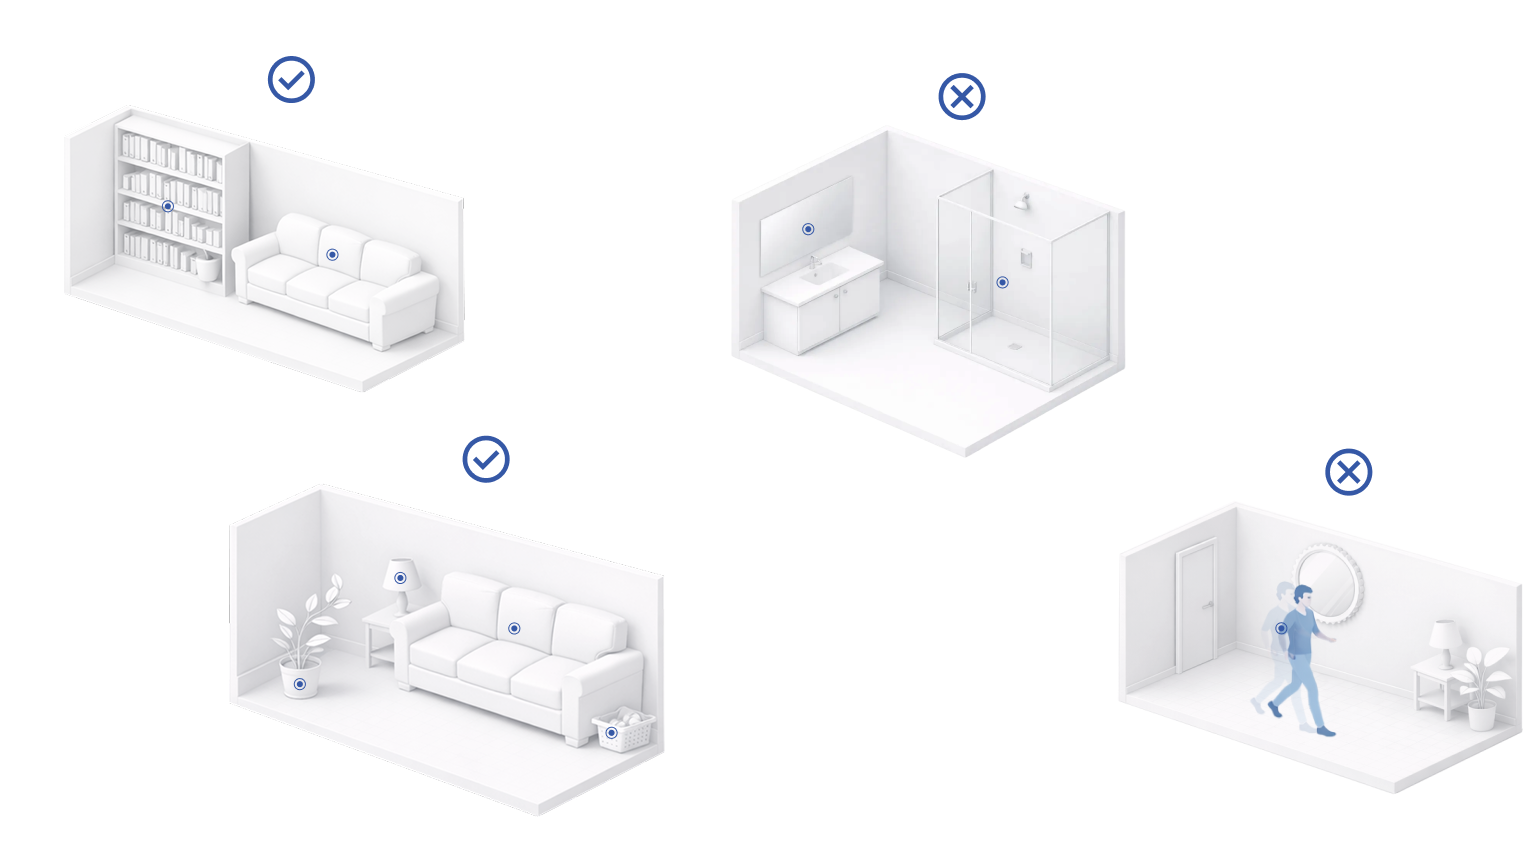
4.4 Minimize Problematic Conditions
Be mindful of:
- Repetitive structures (long blank walls, identical tiles)
- Featureless ceilings or floors
- Reflective or transparent surfaces (mirrors, glass)
- Moving objects (people, doors)
Moving objects are not an automatic failure, but minimizing motion improves consistency. If there is a moving vehicle or large crowd, hold your device up to avoid the dynamic object taking up most of the camera’s perspective.
5. Recommended Scanning Patterns
These patterns are recommended. For recommendations based on size of the area of interest, see section 9.
5.1 Overview Scan (Base Scan)
An overview scan provides a base localization layer, and is especially useful for roin confined rooms.
How to do it:
-
Stand near the perimeter of the space
-
Perform a loop around the area
-
Complete three runs:
- Facing forward (middle)
- Angled upward (ceiling)
- Angled downward (floor)
Ensure overlap between runs, especially where ceilings or floors lack features. Depending on size, multiple scans might need to be performed to complete all three runs.

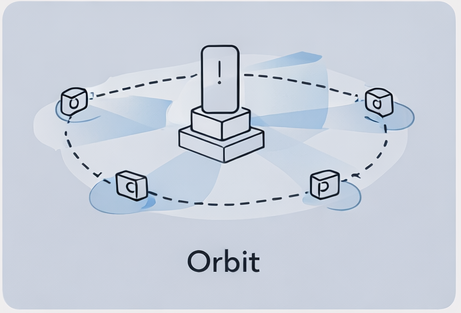
5.2 Orbit Pattern
Use this when scanning:
- Furniture
- Statues
- Monuments
- Points of interest
Guidelines:
- Maintain a consistent distance
- Move laterally or in a circular path
- Avoid stepping straight forward and backward, but instead walk slowly along a path
5.3 Perimeter Loop Pattern
This is similar to a base scan, but used outside. Walk the boundary of the space:
- Move the camera left to right, being intentional with speed
- Capture various feature points
Having both clockwise and counterclockwise passes help to increase the view points for a site and later on, its assets.
5.4 Lattice (Grid) Pattern
Use lattice scans for large continuous areas and pairing with perimeter scans.
How it works:
- Perform perimeter scans first
- Add interior passes in a grid or crisscross pattern
- Ensure lattice scans overlap with perimeter coverage
6. Indoor Scanning Use Cases
6.1 Single Room
Recommended approach:
- Overview scan (base scan)
- Detail scans for specific objects or areas, slowing down pace to capture these finer details
- Start and end detail scans from views seen in the overview
Don’t forget:
- Ceilings
- Floors
- Corners and transitions
6.2 Multiple Rooms
Key considerations:
- Doorways and hallways are critical connectors
- Ensure each room scan overlaps with shared features
- Avoid treating rooms as isolated spaces
6.3 Multiple Floors
When scanning vertically:
- Capture staircases thoroughly
- Maintain visibility of shared features between levels
- Slow down during elevation changes
7. Outdoor Scanning Use Cases
7.1 Specific Site or Point of Interest
Recommended:
- Orbit scans at varying distances
- Include surrounding context, not just the object
- Avoid tight close-ups without wider references
7.2 Large Continuous Outdoor Areas
Recommended sequence:
- Perimeter scan (clockwise)
- Perimeter scan (counterclockwise)
- Lattice scans across the interior
This improves robustness in terms of coverage. If the area is too big, break down the site to smaller chunks and complete a scan of each section.
8. Indoor + Outdoor Combination Scans��
When transitioning:
- Pause briefly at thresholds (doors, entrances)
- Ensure features from both environments are visible
- Expect lighting changes and adjust pacing accordingly, moving slower in darker settings
9. Deciding Which Pattern to Use
Use this simple guidance:
- Single enclosed space → Overview + Triple-Run
- Object or landmark → Orbit
- Long boundary or room sequence → Perimeter Loop
- Large open area → Perimeter + Lattice
Patterns can be combined as needed.
10. Reviewing Coverage and Identifying Gaps
10.1 Using Playback Sessions
Playback sessions help you:
- Visualize where you walked
- Identify missed areas
- Confirm intended behavior paths
10.2 Inspecting Assets in the Web Portal
Inspecting meshes and splats can reveal:
- Sparse regions
- Misaligned areas
- Coverage gaps
These signals help decide whether additional scans are needed.
10.3 Adding and Activating Additional Scans
You can:
- Add scans incrementally
- Select which scans are activated for a site
- Build toward intended behavior over time
You do not need to rescan everything to improve coverage.
11. Common Issues and How to Avoid Them
- Patchy results: Increase overlap and lateral movement
- Poor localization: Start scans from known views
- Missing ceilings/floors: Use vertical triple-runs
- Over-scanning: Focus on coverage, not duration
12. Final Tips for Reliable, Reusable Scans
- Move deliberately, not quickly
- Think about what the camera sees, not what you see
- Scan with the intended experience in mind